2017. november 23., csütörtök

The Yoga Mat

I got a recommendation from a thorough Yoga Mat testing, HERE can find it. Thank you, it is very well work and I recommend reading it too, because it is really important question in the daily Yoga practice.

The article inspired me to describe my Yoga Mat experience:

It is very old and very special mat, because I can fold it:


This is for me important, because some asana need a bit thicker mat, for example the Headstand.

I bought my Yoga Mat an polifoam factory in Hungary for 3-4dollar (converted from Hungarian Forint) about 15 years before. I use it and I'll take it myself everywhere ever since: in Malta or in Azores.

The biggest damage my kids did in it :) my yoga practices not. Many time I take it to the washing machine and never was problem.


So this was my Yoga Mat story.


Om Namah Sivaya ✿

2017. október 16., hétfő

The Lotus Pose - Padmasana


In the Yoga, the Lotus is a base seated pose, yet it is difficult for many to perform, forced and painful feeling. That's why I want to help it step by step to teach.

First of all sit a lot (much as you can) on the ground. This helps to loosen your hips and prepares your lower body.

On the floor sit on a comfortable blanket or carpet and initially lift your bottom (your feet no). The pillow is gradually replaced by a roll of blanket and the lifting be to the back of your bottom.


Find a comfortable seated pose in which you can stay for a long time, example:Keeling Pose - Vajrasana:
vajrasanaside.jpg
Easy Pose - Sukhasana:
easy-sitting.jpg
or the Burmese Sitting (the feet are parallel):
54eb7fd2c60e6_seated-pose-mdn.jpg
These seats can be combined and we will be able to sit on the floor for a long time.


Sometimes we can to relax in a Butterfly Pose, or stretch our legs alternately to stretch and relax mainly around the thighs and knees.


If we are prepared for the Lotus seat, we can comfortably and for a long time to sit on the ground practicing first the Half Lotus Pose. Place one of our feet on our thighs:
half-lotus-ardha-padmasana1.jpg
be sure to keep both our feet for the same amount of time on your thighs.

Then, relax your ankle as follows: sit in a stretched seat, bend one foot, put it on our thighs as if it were on the half Lotus. Hold your bent feet at your toes with your hands and move them gently, circling in both directions. Let's try to relax your feet completely, just move your hand.


If you can easily do a half Lotus seat, you can try the full Lotus seat: put both legs at the base of your thighs, but be careful to keep one foot
for the same amount of time
 than the other one.
 lotus-pose-and-blowing-in-a-firm-pose.jpg
Note: even in the hot summer, do not sit on with naked leg in the Lotus seat, your feet will to sweat, to stick and uncomfortably to pull your skin.


Om Namah Sivaya ✿

2017. május 15., hétfő

Yoga and the Technics

You can support not only through reading the Internet our yoga at home nowadays. There are many other technical device that can help it.

Such as your camera and video production tools.

Because if you are uncertain about the accuracy of the workmanship, you can record it and then look back to see where it is necessary to correct it.

I take pictures of the correct asana, and I try to describe it as clearly, but there are lots of photos and videos on the web too, you can find it.

If you do not have anyone who can help to make picture, you can easily do it with timer. It is worth make with the longest time interval, and even then you can spend enough time to keep, to specify and do the most of the asana.


Om Namah Sivaya ✿

2017. április 29., szombat

Pregnancy Yoga Part 3. - Spine Exercises


After Shoulder and Hip Exercises continue with...

Spine exercises:


Cat Pose


Start in on all fours Pose. With exhale close it down your head and your hip with curve back, then lift up those high with inhale. Do it slowly, synchronously with your breathing. Practice a few times. The Cat Pose refreshes the whole spine from the cervical to the caudal vertebrae. The main practice to the lower back pain. After relax in Child pose.

Child Pose

Relax with opened knees (because for your belly need place!) outstretched arms in Child Pose.

Easyer Locust Pose


Start in on all fours pose again and raise one foot backwards with a deep inhale just as good as high. Hold it for a short time and then do the exercise with the other leg. If you want to make it difficult, raise your opposite arm upwards too. Take care of your balance, look stiffly at one point, it is help to keep your balance. Then relax with opened knees and outstretched arms in Child Pose.

Dog Pose (in a smaller straddle)

Lift your hips high from on all fours pose, your feet and arms be stretched. Hold the Asana as long as it is good. It releases the hip area and stretches the whole body. After the practice relax with opened knees and outstretched arms in Child Pose.

Tree Pose
        
This is balancing exercise, let's look at a point rigid before and then you can keep your balance. Stand in one leg stable and slowly lift the other leg just as comfortable for you. If you stand stable raise your hands high as you know. Keep it, stretch up. Practice with both feet. Hold the Asana as long as it is good. It enhances concentration ability and balance sensitivity.

Standing spine twisting


Stand up. Put your right leg forward and left leg at the back, than do the lifted right hand at the back and left hand forward, twist the entire upper body to the right side including your head. Keep it as feel as good. Repeat it in the opposite direction.

Triangle Pose in kneeling


This is a easyer Triangle Pose and that is started from kneeling. Stretch it your left leg to the side, and stretch up the arms in full length. Exhalation and bend left sideways and keep the exercise as long as it's good. Repeat for the other side. It helps digestion, stretches the entire upper body while loosening the hip.                                    

Finally relax a longer in Pregnancy Savasana, in the Tiger Pose with deep abdonimal breathing.

Om Namah Sivaya ✿

2017. április 19., szerda

Pregnancy Yoga Part 2. - Shoulder and Hip Exercises

After the Eye-, Neck-, Breathe Exercise stay in sit cross-legged (or other yoga sitting pose) and do some...


Shoulder and Hip Exercises:


Bending to the side


Bend to the one side with deep exhalation, rise back to the center with deep inhalation and bend to other side with deep exhalation. This exercise stretch the entire torso and shoulders, helps digestion, refreshes the spine and waist. Carry out a few times to the each side.

Easy spine twisting pose

Twist your spine as follows: put your right hand to the back and put your left hand to the right knee. It refreshes the whole spine, keep it as long as well. Turn back slowly and now put your left hand to the back and put the right hand to the left knee. Keep it again as long as well. Strive to turn with your head too during the exercise, then receive the cervical in twist also.

Butterfly Seat


Touch your soles together and pull your foot heels to your groin. Try to keep your knees towards the ground and come near to down with every exhale. This exercise is very good for your hip, beneficial for mothers, it helps expand your pelvic girdle and preparing for childbirth. Stay in the Asana as long as it feels good.

Straddle


Sit in comfortable straddle, stretch your hands high and bend forward with straight back until your tummy permits. It is also very good for your hip and pelvic girdle extension practice. Hold the position for as long as you want it.

Pigeon Pose (easy variant)


Always practice after straddle. Pull your right foot to your groin and stretch your left foot to back. Rely on your hand, keep your body straight. Keep the Pose as long as it feels good and change foot. It provides the thighs and hips in the opposite direction and refresh your hip and pelvic girdle. 

Relax few minutes in Pregnancy Savasana - in Tiger Pose.

Om Namah Sivaya ✿

2017. április 16., vasárnap

Pregnancy Yoga - Introduction

The pregnancy yoga not much different from the traditional yoga lessons. There are special exercises which we practice more and are some positions which we are avoided.

I would start first with what it's not allowed, what to take care:


-do not perform any exercises what too strenuous, uncomfortable and cause any discomfort in to the body.
- do not lying prone exercises
- do not bend too back or too forward bending exercises
- do with caution the inverted postures, always practice the lighter variations
- if you've never do yoga before, and the pregnancy yoga is the first relationship with the yoga, better if you performed the exercises with yoga instructor
- rest the first 12 weeks of rather a lot and after the placenta stable operation, start the pregnancy yoga.
- we usually do not Sun Salutation, or only very mild form performed


And what is allowed, and recommended:
The relaxation is very-very important and beneficial during your entire pregnancy. A stress-free state of necessity during the pregnancy!

But the pregnant relaxation pose is other like as usual Savasana! For the pregnant woman is not comfortable to lie on the back, nor is it advisable, because the baby's weight can press on the main artery in the body, because of this anoxia may occur.


Therefore we do the relaxation in Tiger Pose always, as follows:

Lie on the side, bend your leg at the knee up above, lean on the knee, bend your arms and also pull up, lie your face on your hand.

We can to do the pose more comfortable if we put a pillow or rolled-up blanket under the tuck knee.


Start the yoga with relaxation or meditation always.


I recommend the following exercises in Padmasana or some comfortable yoga sitting:
/Sit cross-legged, aligning your head, neck, and spine. Keep your shoulders straight but relaxed/

Eye Exercises

Neck Exercises


Abdominal Exercise:
Do not make legs lifting or full sit up, just some half-soft sit up! Like this:


Breathing Exercises: abdominal breathing, complete yoga breathing (3+ do not more), changed nostril breathing without breathing retention. More breathing exercises recommended for pregnant: sitahli, brahmari.

...TO BE CONTINUED...

Om Namah Sivaya ✿

2017. március 29., szerda

Neck Exercises

If we attuned to the Yoga with relaxation or meditation, after we must to do some warming-up exercises, prepare our body for the exercise of asanas.
The first and main warm-up exercise are the Neck Exercises - to do always avoid injury!


Sit cross-legged, aligning your head, neck, and spine. Keep your shoulders straight, relax your neck, close your eyes, breathe deep abdominal breathing, focus on the neck muscles and practice these four exercises:

1. Head Back and forth

Inhale, and drop your head forward gently (exhale). Be near your chin to your chest. Then slowly drop it back (inhale). Be near your nape to your back - practice 10 times or as many time it feels good, then loosen your neck muscles, relax and breathe with deep abdominal.

2. Head side to side

Tilt your head to the right shoulder (exhale), slowly back to the center (inhale), and to the left shoulder (exhale). Be near your ears to your shoulders, but stay your shoulders down - practice 10 times or as well, then relax and breathe with deep abdominal.

3. Head turn to right and left

Turn your head to look over each shoulder in turn to right (exhale) slowly to the center (inhale) and turn to left (exhale). Be your chin parallel to the ground. Focus your cervical how to twists - practice 10 times or as many time it feels good, keep the last some second to right and left too, relax and breathe with deep abdominal.


4. Head Circling

Drop your head forward (exhale) gently and then slowly start the circling to the right hand side, then back (inhale) and continue to the left hand side and forward again (exhale). This is one round - practice 10 rounds or as many time it feels good in both directions, then loosen your neck muscles, relax and breathe with deep abdominal.


Finally do some tense and loosen with your shoulders. Pull up your shoulders to your ears, keep it, then let down and loosen. At you experience the tense and loose different of status.


The Neck Exercises resolve accumulated the tension around the neck, refresh the entire cervical section. It is beneficial after prolonged seated work.

Om Namah Sivaya ✿

2017. március 25., szombat

The Eye Exercises - Part 2.

Previous eye exercises we should don't focus with our eyes (clearly to see), we just moved. The next two practice however, it is focusing on the essence:

1. Open your eyes, lift your thumb in front of your faces and your eyes alternately on the tip of the thumb and looking at a distant point. Practice 10, or as often as it feels good. Then close your eyes, loosen the eyelids.

2. Open your eyes, lift your thumb in front of your faces and focus on the thumb tip gently move your hands back and forth in the space. Practice 10, or as often as it feels good. Then relax, to rest your eyes closed.


Advanced Eye Exercises are: the DRISTIS and the TRATAK. These exercises stimulates the nerve centers, develop the concentration and strengthens the eyes. Start doing it gradually.

DRISHTIS - six type of drishti are the following:


1. Dakshina drishti: Open your eyes, move your eyes to the right corner with your forefinger helping, without moving the head. Keep as you know without blinking. Relax your eyes closed after the practice.

2. Vama drishti: Open your eyes, move your eyes to the left corner with your forefinger helping, without moving the head. Keep as you know without blinking. Relax your eyes closed after the practice.

 3. Maddya drishti: Open your eyes, but just semi-open and focus to something in before you. Keep as you know without blinking. Relax your eyes closed after the practice. (This eye keeping is a meditation technique too.)

4. Brhumaddya drishti: Open your eyes, move your eyes to the center with your forefinger helping. Keep as you know without blinking. Relax your eyes closed after the practice.

5. Nasagra drishti: Open your eyes, move your eyes to the down the middle (tip of nose) with your forefinger helping. Keep as you know without blinking. Relax your eyes closed after the practice.

6. Shambawi drishti: Open your eyes, move your eyes to the up the middle (two eyebrows among)with your forefinger helping. Keep as you know without blinking. Relax your eyes closed after the practice.

TRATAK:

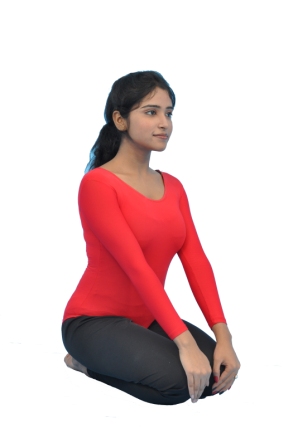
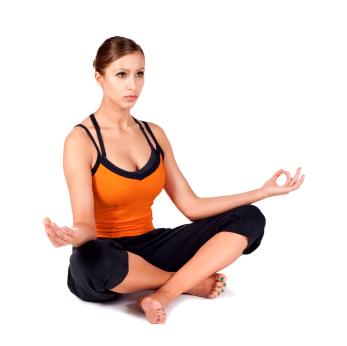
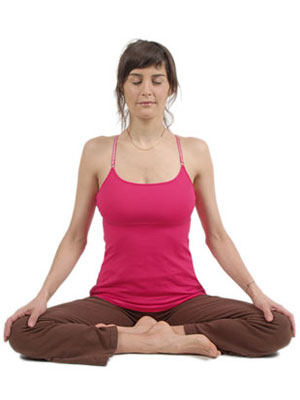
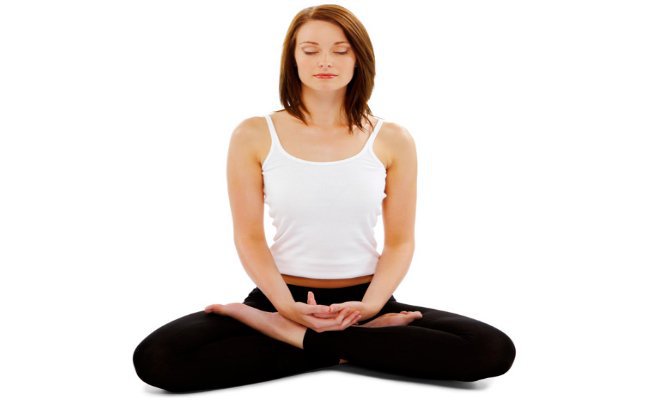
For this exercise we need a burning candle and a dark, draft-free room. Sit on the candle at eye level, about arm's length, preferably in Padmasana or some comfortable yoga sitting. Open your eyes and look into the candlelight as you know without blinking. Then we rest with closed eyes and observe with our inner experience. Repeat the exercise three times.
Tratak is the one from the six cleaning yoga practices (six kriya).


Swami Vishnu Devananda show the Tratak.

Om Namah Sivaya ✿

2017. március 24., péntek

The Eye Exercises

Yoga is a complex thing and if we say: "Yoga is a lifestyle" then we must insert into everyday life, to the today's problem.

Our eyes are exposed to many harmful effects nowadays. I do not want to list now, we all know what they are. Therefore it is most important to support this wonderful senses, what is the our greatest treasure.

Moving the eye muscles helps your metabolism of eyes, improves our vision and strengthens our eyes. The Eye Exercises enhance the concentration, develop and improve the anamnesis and our focusing.

Instructions for the exercises: sit on the floor in Padmasana (or some comfortable yoga sitting pose), sit with straight back, put your hands on your knees in Chin-mudra. Keep your heads straight and pay attention this aspect throughout the exercises. Close your eyes and focus on the eye muscles. Keep your face relaxed throughout the exercises, breathe with abdominal and make sure that only the eyes move. Do not move your head.

And here are the exercise:

1. Up and down
Open your eyes, look up the highest point and then move your eyes slowly down to the lowest point without moving the head then back up ...  practice 10 times or as many time it feels good and then close your eyes, breathe with deep abdominal and relax.

2. Right and left
Open your eyes, look to the right on the edge of the horizon and look slowly to left without moving the head and from left to right ... repeat 10 times or as many time it feels good. After close your eyes and relax.


3. Diagonally up and down
Open your eyes, look up diagonally to the right corner and from there look down slowly to the left corner. Practice in one direction 10x (or as often as it feels good) and after relax with closed eyes a bit. Then open your eyes and move to the other direction (left up - right down) 10x (or as often you moved on the opposite direction) then close your eyes to rest again. Breathe abdominal and relax.


4. Eyes circular movements both directions
Open your eyes, look up the highest point and start the eyes circular movements to the right hand side on the horizon without moving the head. Do 10 rounds (or as well) then loosen the eyelids, close your eyes a bit. After move the eyes with circular to the left direction 10x (or as often as you did to the right direction) then loosen the eyelid again.


Finally relax your eyes as follows:
Close your eyes, rub your hands until the warm feeling and put your warm hands to the eyes like a dome (don't touch your eyes), breathe with deep and relax. Feel the warm and dark relaxing effect.
After endure the relaxing to your face: tense your facial muscles toward your nose (like a grimace) keep it and loosen it. At you experience the tense and loose different of status. 

Om Namah Sivaya ✿


2017. március 16., csütörtök

After omission to do Yoga

For everybody have in the Life an events, accident, or any problem when can not to do Yoga, when must to omission.

After that time we must be careful come back to the Yoga.

The best is if we start with the Surja Namaskar (Sun Salutation) in a very slowly rhythm, every  exercise hold it, and breathe slowly and deeply.


And do not worry, the our body is wonderful, recovers quickly, if you practice regularly.

Om Namah Sivaya ✿